Bare rooted plants are field grown plants which have been dug up from the soil in their dormant state, no soil remains attached to the remaining root mass, hence the term ‘bare rooted’. Read on if you’d like a head start on all things bare rooted.
The significant root loss during this process means the remaining roots need to be protected and new roots encouraged to grow. At BAAG we pot up nearly all of our bare rooted stock in order to protect roots from drying out and being physically damaged.
Many thousands of bare rooted plants are successfully established by gardeners every year. It is a very efficient and economical way of planting deciduous trees and shrubs. However, given the nature of bare rooted stock, there are several tips that will maximise your chances of success:
Preparation:
Prepare the soil in advance. You want the best possible soil for your plant. This commonly means digging organic material (compost) and manures into the soil. We also recommend adding zeolite* to the soil mix. It is important that you combine everything together, do not plant into straight compost. The soil, compost and manures need to be mixed together. Ensure that the soil mixture is nicely damp throughout.
Planting:
If necessary you can keep your potted bare root plant in the pot for several months as long as it is kept moist.
When your soil is prepared and you are ready to plant:
Dig a hole and keep the soil off to one side, you will need this later.
Water the plant the night before so that the potting mix is moist but not saturated.
Lie the pot on its side and carefully ease the plant out of the pot and gently place the plant in the hole. Most of the potting mix will fall away as there will not be much root mass to hold it together. You want to keep the potting mix together as much as possible to prevent it falling away and tearing off any fine root hairs that may have developed.
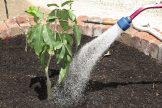
Hold the plant in position and fill the hole with the soil you have kept off to one side. To avoid collar rot, make sure you only bring the soil up to the level that the potting mix was. Tamp it down firmly and water the plant in well with a solution of Plant Starter/Seasol/Maxicrop or similar liquid fertiliser. These help to stimulate root growth.
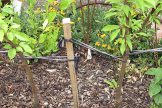
If the tree needs staking, place the stake far enough away that they are in undisturbed soil and hammer firmly into the ground. Don’t make the ties too tight; allow the tree a bit of movement.
Pruning
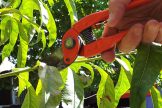
Apricots: These are the exception to the rule. Do not prune now, prune in Spring after the foliage has appeared. Remove at least one third of the tree’s branch structure to reduce the leaf load in the first year. Prune again in autumn (this is the normal pruning time for apricots) before the tree loses its leaves. Apricots should be pruned into an open vase shape.
Figs: These will often die back at the tip, so wait until the leaves emerge before pruning back to a healthy bud. Figs can take a long time to leaf up in the first season after being planted out as a bare root tree.
Roses will already have been pruned. You can tidy them up a bit if needed.
Fruit trees and ornamental blossom trees: Prune back by at least one third to one half
Ornamental trees: Shape is important, so remove any crossing or damaged branches, and lower branches as necessary.
Maples These can die back at the tips, so wait until the foliage has emerged and prune back any branches showing dieback, allowing a longer stub than normal as maples tend to die back from pruning cuts.
Maintenance
In the first year, your primary concern is establishing a good root system. Keep the soil consistently moist, avoid either drying out or water logging the soil, as this tends to kill those fine root hairs you are trying to encourage. Once bud swell has occurred, give all bare rooted plants a monthly drink of Plant Starter/Seasol/Maxicrop or similar liquid fertiliser.
Pest and Disease control
Copper sprays for peach leaf curl
Watch for pear and cherry slug and use Di-pel or Success.
Watch for Elm leaf beetle, treat with a physical adhesive barrier, or call an arboriculturalist.

