Espaliering is a fantastic way to grow trees (including fruit trees) in smaller spaces. It does require regular work and is definitely not recommended for the lazy gardener or those scared of secateurs, however the effort is well worth it.
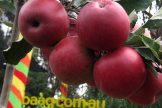
Espaliering trees is a way of making them two-dimensional rather than three. It is all about maintaining the height and width of a plant while reducing the depth and is a great way of maximizing the productivity of a warm sunny spot along a wall or a fence. Effectively, it means you can grow what is normally a big tree (or two) in a much smaller space. We have quite a few examples for you to look at in our Edible Alley (located in our driveway) and all the pics on this page are from that garden (except the large picture above, that one is outside our classroom doors in the nursery). Have a look next time you come down.

Where to start
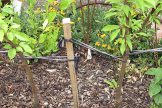
You need to pick a nice, sunny spot as almost all trees (especially fruiting ones) will perform best in this type of location (north facing walls are fantastic). Attach either wires, or pre-fabricated trellis frame to the face of the structure, making sure the fence/wall/shed can tolerate a bit of weight (it will be supporting a tree after all). If the fence or wall is prone to getting particularly warm (bricks or colourbond / galvanised steel) you may need to build a trellis frame and sit this about a foot in front of the surface as this will stop the plant from cooking in the summer heat.
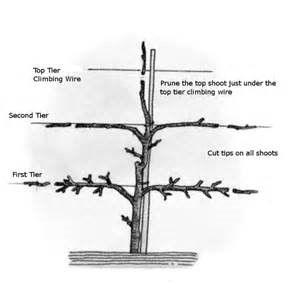
Once you have picked your spot you need to consider what shape you would like your espaliered tree to take… essentially this is a choice between formal and informal. Formal espaliers are highly regimented, and can take a little more haircutting and training than informal, but they look great. Informal espaliers can take whatever shape you like, and you can get really creative with this. For beginners, the easiest (and most common) type of espalier is a three wire system, with the wires attached to the structure, and positioned about 30cm apart.
Select a tree that lends itself to being grown flat, meaning that it a two nice strong horizontal branches, and a strong, straight trunk. It’s time to get ruthless, and chop off any unnecessary branches and twigs. Cutting back the remaining branches will also encourage new growth, which is important if you want the tree to fruit. The middle stem (or central leader) should be allowed to eventually reach the top wire, or wherever you would like the top of your espalier to be. When planting, cut this middle stem back to the second wire and leave the buds facing the wire. These will become the new layer of branches next season. Repeat this in the third season, cutting back the central stem to the third wire, and so on.
The branches then need to be attached to the wire or trellis, using flexible clips or old stockings. Ensure you do not do these up so tight that you amputate the branches or trunk.
Espalier Shapes
Espalier is regarded by many as an “art form” and thus there are a whole variety of different shapes, styles and forms this method of tree growing can take on. Here are some of the more common ones:
Cordon – The training of a tree to grow as a single stem. There are a load of different types of cordons, and the bulk of the trickier espalier styles rely on a multiple cordon approach.
Horizontal or “T” Shaped Cordon – As the name suggests, the branches of the tree grow horizontally from the central trunk. Possibly the easiest espalier method for beginners, and a great way to cover an ugly fence/wall/shed/neighbour really quickly.
Fan – From the central stem, the outer branches on both sides are trained upwards, at about a 45 degree angle, to create a very pretty fan shape. Is particulary attractive when performed with apple trees. Also known as the ‘oblique palmette’.
U shaped or ‘double cordon’ – The traditional espalier, the double cordon often resembles a branched candleabra, or ‘menorah’. This is a tricky little espalier, but one that is sure to turn heads, the double cordon trains the side branches out from the stem at a 90 degree angle, and then upwards at a sharp 90 degree angle. The smaller lateral branches are allowed to grow out away from the main trunk, giving a beautiful shape, whether the tree has foliage or not.

And then what? Generally, fruit trees are pruned back quite hard over winter, to promote great growth and fantastic fruit come spring. This is no different for espaliered trees, although a couple of prunes during the warmer months (growing season) will also assist in maintaining and training and should result in a great looking espalier in years to come. Just be aware that some fruit trees bear their fruit on 2 to 3 year old wood, so don’t get too enthusiastic and cut off all your fruiting wood.

